
The App-ID and content-ID engines of the Palo Alto next generation firewall (NGFW) identify the application in use by examining the traffic/packets within a session. Once the firewall has seen enough packets to determine what the application is, it will stop trying to identify it and will send the session to dedicated hardware for future processing, also known as fast-path or session-offloading.
If the firewall cannot determine what the application is, it will continue sending each new packet in the flow to the CPU for processing, also known as slow-path. So if you have a chatty protocol using small packets, processing the session via slow-path will generate additional processing overhead, and will degrade performance for that traffic flow.
As a general rule, if the Palo Alto firewall has seen more than 10 packets in a flow, and the application is still not recognized (i.e. incomplete, unknown, undecided), there is a strong possibility it will benefit from an app-override policy. Applications that can also benefit are custom-written applications that are not in the PAN-OS App-ID database and small packet UDP applications that are highly sensitive to latency.
Here are the steps to identify traffic flow details and implement App-ID override:
- Verify source and destination IP session details
- Verify ports in use
- Create custom application object
- Create application-override policy
- Verify the app override is being used
1. Verify source and destination IP session details
The first step is to verify the session details. Acquire a source IP address and destination IP address for the flow in question, and then type the following command into the CLI (while traffic is actively generating traffic):
![]()
![]()
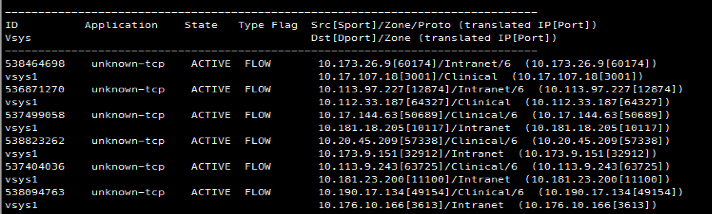
This command output will narrow down results and help you find the session you’re troubleshooting. Notice the application is labeled as unknown, and notate the session-ID on the far left side of the output. Once you find the correct source/destination IP address session ID number, type this command to retrieve the specific session details:
![]()
Notice the server-to-client (s2c) and client-to-server (c2s) packet counts. If either of these numbers is above 10, the firewall should (in most cases) have seen enough to identify the flow. If substantially more than 10 packets have traversed the firewall, and the application is still unknown, undecided, or incomplete, the flow will have a performance benefit from implementing App-ID override.

2. Verify ports in use
Once you’ve verified this flow could benefit from App-override, run the filter command again to get the specific ports used in this flow. Again, perform this while traffic is actively being generated.
![]()
In this example, the client sources traffic from an ephemeral port (random selection from non-well-known port range) going to TCP port 514 on the server. TCP is notated by the use of the “6” on the source port row, representing IP protocol number 6, which is TCP. If this was a UDP flow, there would be a “17” there instead.
NOTE: There may be one or more ports used by the application; it is also possible they will rotate or use a range. Test multiple times with the end-user generating traffic to ascertain all possible port numbers.

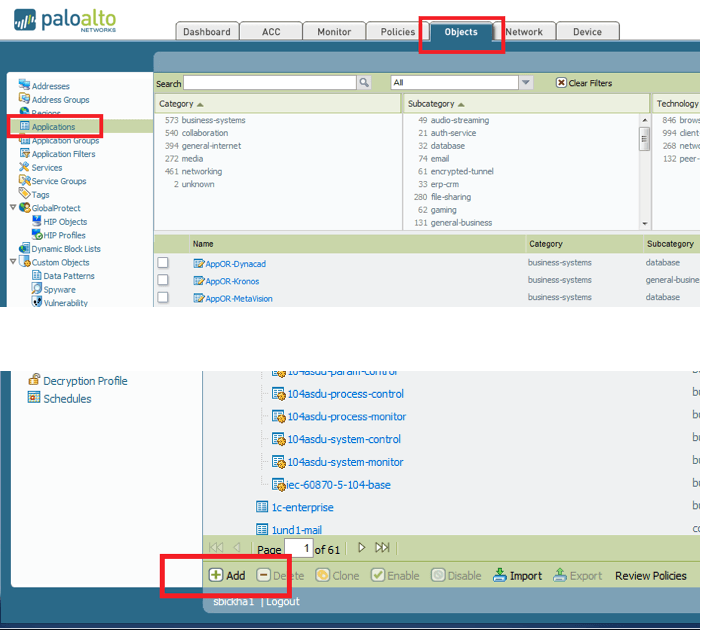
3. Create custom application object
Open the Palo Alto web GUI interface. Click “Objects” then “Applications” to open the known applications database. Scroll down to the bottom of the page and click “Add” to create a new application.
Type in the desired name and properties of this new custom application. The name, category, sub-category, and technology do not affect how the app operates — they only serve to organize and categorize the app for look-up and reporting purposes.
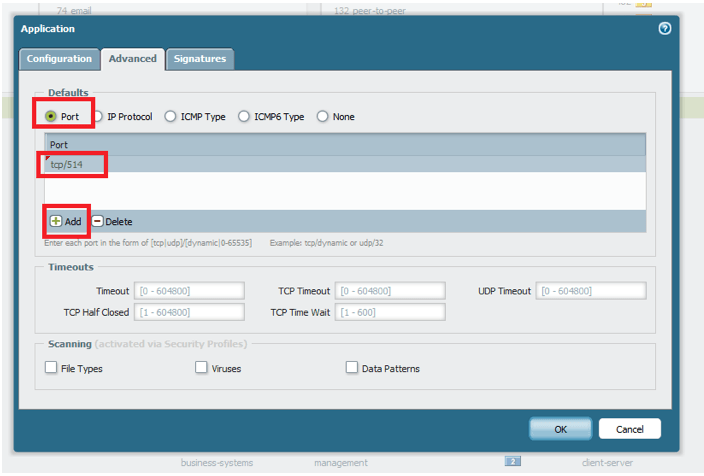
Once you are done entering information on this tab, click the “Advanced” tab to enter the port information for the custom app.
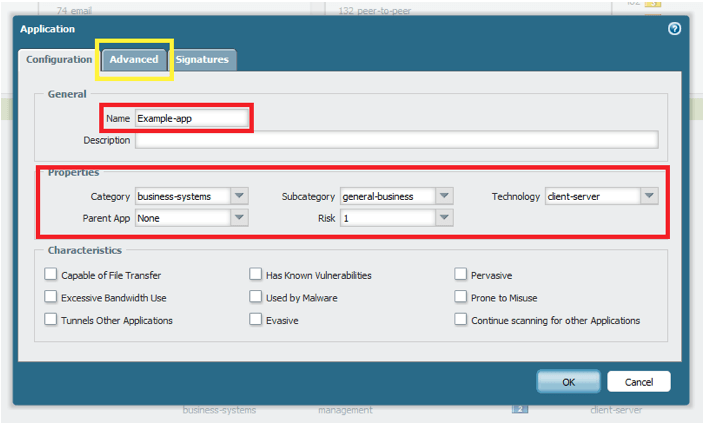
Select the “Port” radio button and then add the ports in use in one of several formats:
- Tcp or udp/dynamic (does not require a port to be specified)
- Tcp or udp/SinglePortNumber – for example: tcp/32
- Tcp or udp/PortNumberRange – for example: tcp/64100-64200
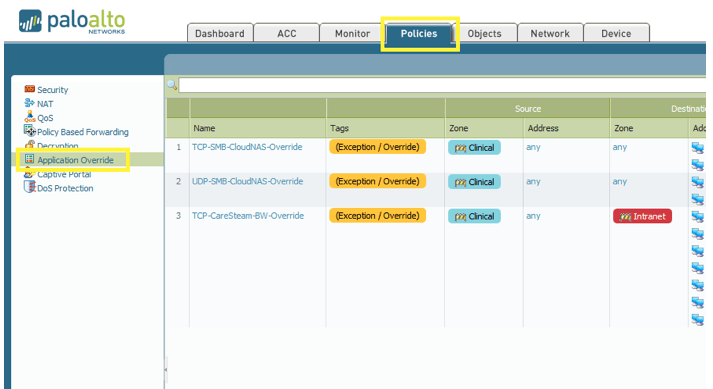
4. Create application-override policy
Once the custom application object has been created, it requires two additional things before it will be used by the Palo Alto firewall:
- There must be a security policy in place that permits the traffic (unless this is a new site or recently added subnet, this should already exist)
- There must be an application override policy that specifies when the custom application object should be used
NOTE: A separate policy must be created for TCP and UDP, if they are both present in the custom application object.
Click “Policies” then “Application Override” from the left side menu. Then click “Add” at the bottom of the screen.
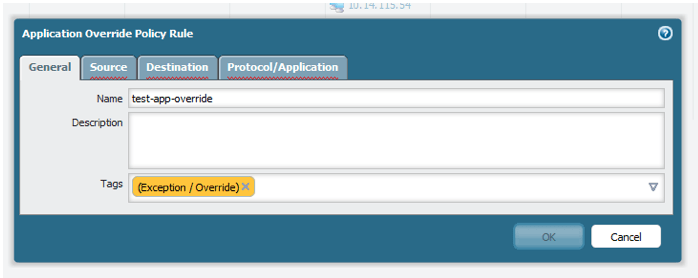
Enter a name for your application override policy. Optionally, tag the policy with an “exception” tag for readability.
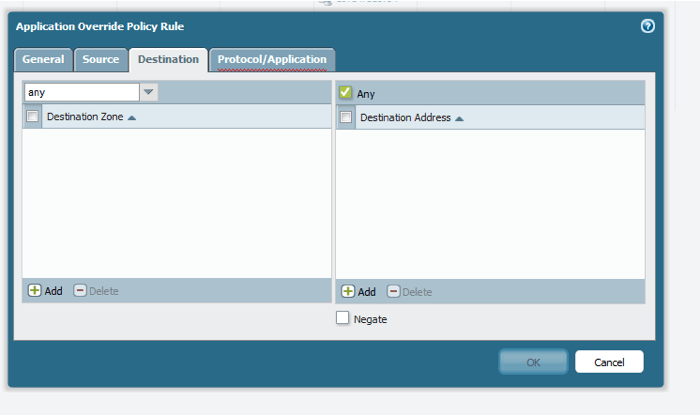
Move to the “Source” and “Destination” tabs. Here, specify the zone and IP addressing information for your application override policy. If you want the override to be universal, and not related to a particular network segment or set of servers, leave the zone as “any” and do not supply IP address information. In general, the scope of the override should be as specific as possible. So try to use the source and destination subnets and zones whenever possible.

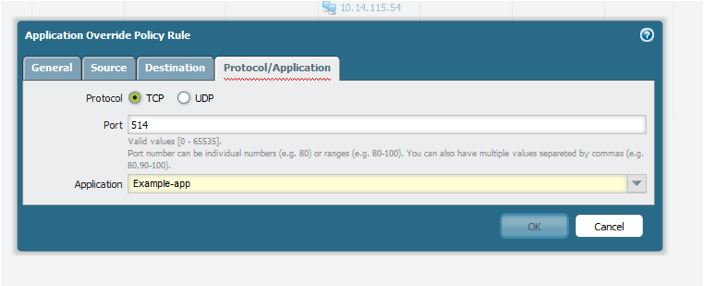
On the “Protocol/Application” tab, specify the TCP or UDP ports once again, and select your custom application object from the drop-down list. Click “OK” and don’t forget to commit to make the changes take effect.
5. Verify the app-override is in use
To verify that the custom application and application-override policy are now in use, return the CLI and bring the up the session information again by using the command:
![]()
The custom application object name should now be listed under “Application.”

NOTE: If sessions already exist and have been previously classified, they will need to be cleared to be re-recognized and utilize the new app override. This can be accomplished by using the following command:
![]()