This is the fifth in a series of blogs, the DNAC Instant Demo tour.
Prior blogs in this series:
- DNAC Tour Part 1: Introduction to Cisco DNA Center
- DNAC Tour Part 2: DNAC Instant Demo: Beginning Your Tour
- DNAC Tour Part 3: General Navigation and Highlights: Dashboard, Drill Down, Assurance, and Troubleshooting
- DNAC Tour Part 4: Getting Started Tasks (Overview): Discovery, PnP, Templates, Provisioning
It’s now time to explore some of the key operational management aspects of DNAC.
Network Hierarchy and Topology
>>>Documentation: Design Network Hierarchy and Settings
>>>Documentation: Display Your Network Topology
One of the initial setup items in DNAC is your Network Hierarchy. You’ve seen the results on the left in the Inventory screen, for instance. This is typically something you’d do upfront and then maintain as needed later. Do it well upfront. Ok, you probably can add floors to buildings when you need them for APs.
Generally, you should set DNAC up with a Site for each geographic location if you have a lot of sites, that is. If you only have a few buildings, then you might skip that step. Or better, do Continent, then Region or Country, then Cities, if your network will grow. (DNAC refers to these as areas and sub-areas.)
You do have to decide concerning the trade-off between making it easy to find a given site and how deep you make the hierarchy.
Tour item: Go to Provision -> Inventory. Expand Africa, which is thinly populated with finer divisions. Then compare North America, which contains the USA, which contains several States. Expanding California, you can see it contains cities. Expand SJC (San Jose) to see the building names.
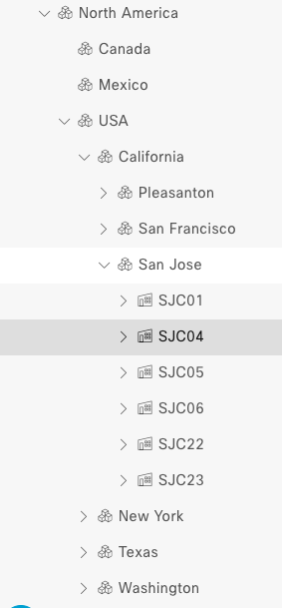
Areas and Sites are containers. For instance, the continents, countries, and states above. They do not have locations.
Each site will have one or more buildings in it. Buildings are assigned physical locations. When you enter the street address, DNAC will look it up online (assuming connectivity to the Internet) and validate it. The Latitude and Longitude will be automatically selected. They can also be manually entered. Or you can subsequently drag to position the map marker correctly.
This enables DNAC to display them on a map! Latitude and longitude from GPS or Google maps work as well.
There are all sorts of advice and settings you can specify, see the documentation for details. Later!
So, if you click on California and zoom in, you’ll see something like the screenshot below.
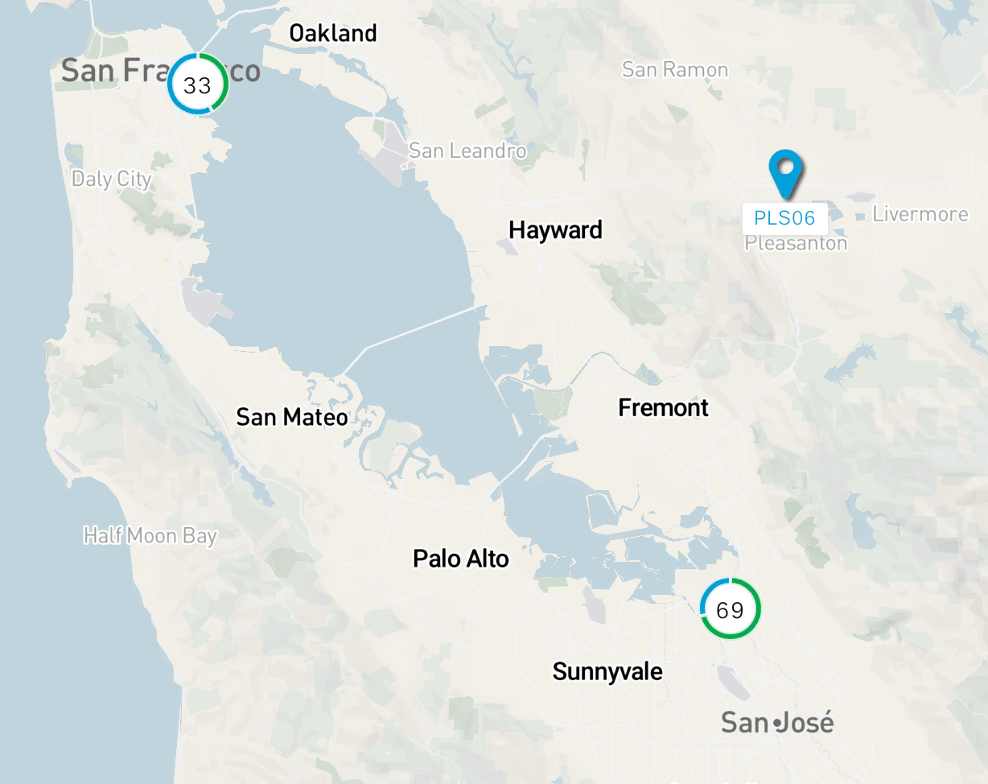
Click on the circled number to drill down.
Buildings contain floors. Floors are for WiFi heat maps. You import the (to scale) floor plan and AP positions, and DNAC does the rest!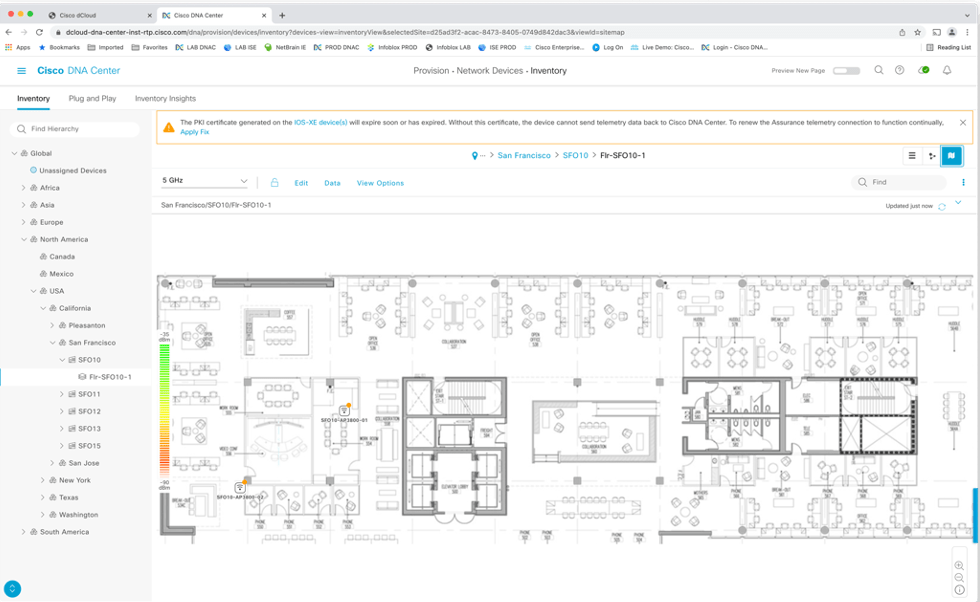
(I had to reload the demo to get this to appear. If things get stuck, you may have to do that. It shouldn’t do that, of course, but the demo environment may be subject to some unique conditions.)
All this was already laid out for you in this demo. Do explore it!
As far as how this all got created, that’s via Design -> Network Hierarchy.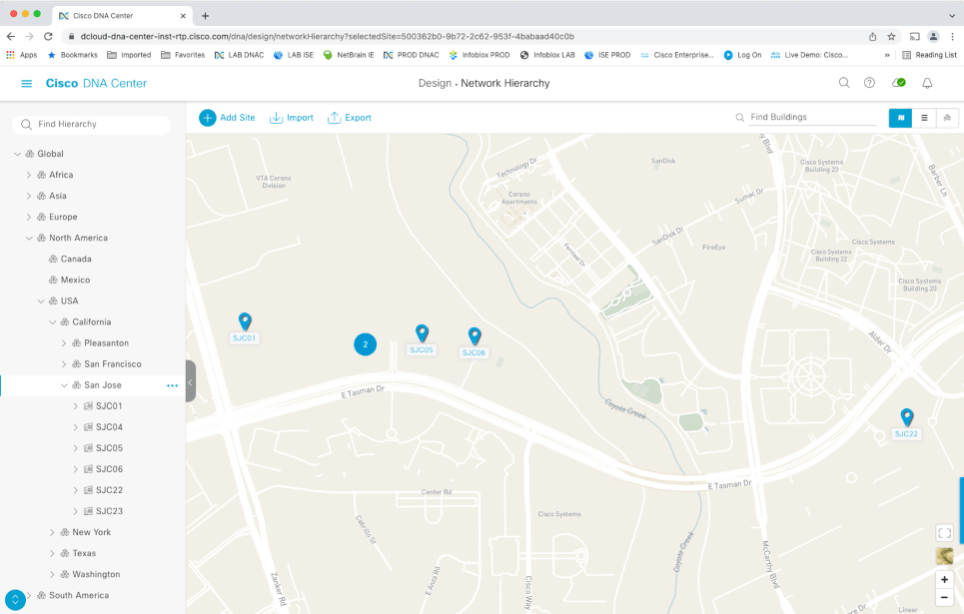
Note the + Add Site at the top left.
![]()
Click on that, then on Add Building.
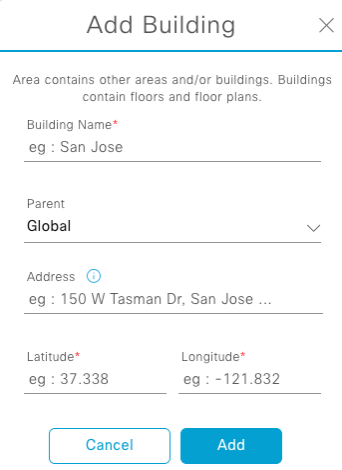
Note the street address and Lat/Long.
So now you’ve seen some of the basic startup items.
After setting up DNAC, you would typically create your network hierarchy, discover what’s already out in the network, and assign devices to sites.
This is sort of Inventory 101 for DNAC: getting organized and getting your devices into the system.
It helps to have structured device names because you can do pattern matching in Inventory, select all or most of the matches, and assign them to a site. That helps a lot when you have many devices!
There are other per-site things you might do. Some anticipate an SD-Access (“SDA”) fabric deployment. Others, not so much.
For instance, one SDA item is assigning IP pools to sites, so it can assign the IP addresses to network links, etc.
Design: Basic Settings
Tour Item: Let’s shift gears a bit. Once you’ve got devices into DNAC, DNAC needs to know credentials, and for SDA, this is where you start specifying information to help DNAC configure devices for you.
Go to Design->Network Settings. Let’s take a look at each of the tabs.
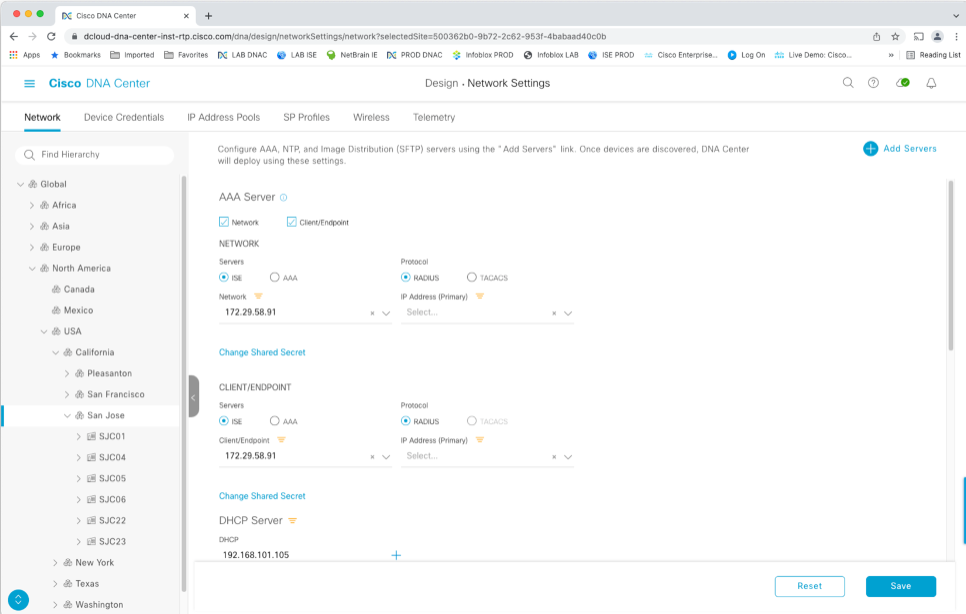
The Network tab contains basic AAA, DHCP server, NTP settings, etc.
Take a look at Device Credentials. Self-explanatory!
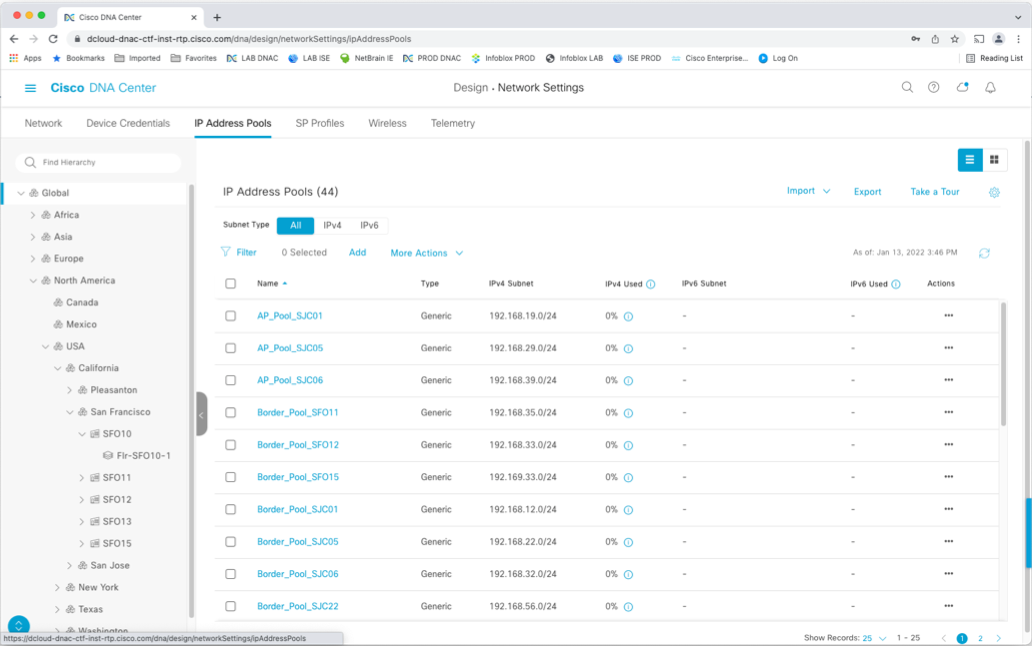
IP Address Pools are, to some extent, an SDA item. You assign several pools to each site. They can be imported from your IPAM or CSV file, or DNAC can even be integrated with some (Infoblox).
I recommend putting the short abbreviation for the site involved at the start of every pool name. (Example: SJCxxx) See my prior blogs about SDA for a discussion of the different IP Pools SDA uses.
SP Profiles is where you can specify the QoS profile for various WAN providers.
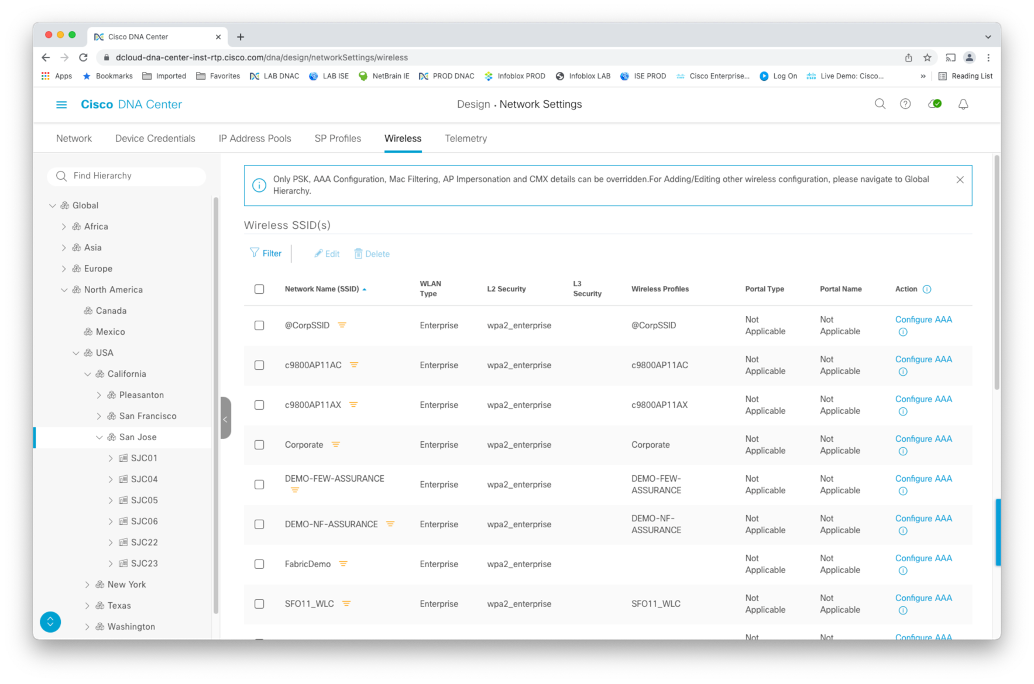
Wireless is where you specify AP SSIDs, etc.
>>>Documentation: Configure Telemetry
Telemetry is where you specify Syslog, SNMP trap, and other similar settings, including Wireless Telemetry. (Scroll down.) See the “Configure Telemetry” section of the documentation for more info.
Software Management (SWIM)
Tour item: Now, let’s take a look at SWIM (Software Image Manager).
Go to Design -> Image Repository.
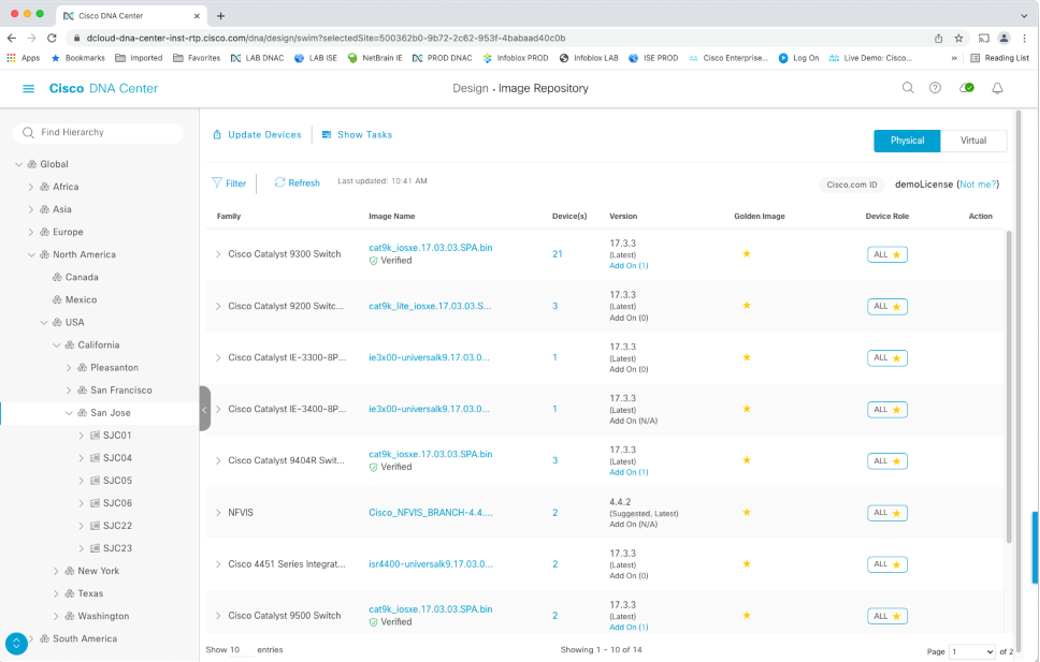
This shows the various types of devices, device roles, and the “golden image” for each (the preferred “good version” as far as you are concerned).
If you click the “>,” each row expands to show alternative software images, which might be older or newer than the golden one.
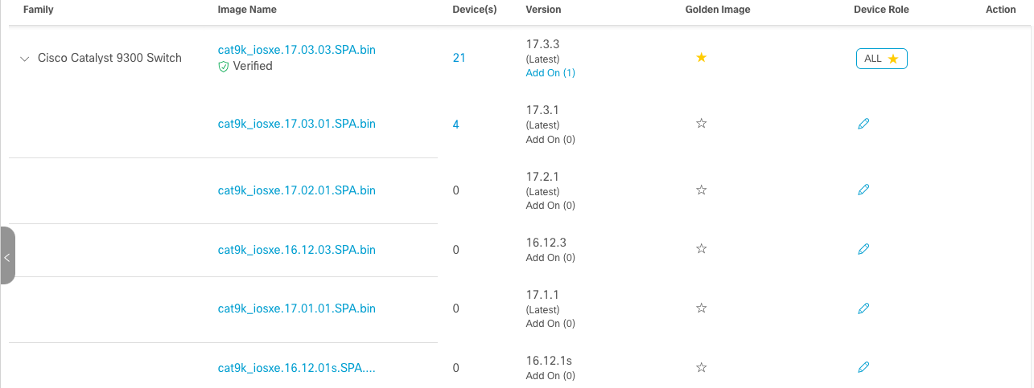
For example, you might download a new code version for testing on one or two devices.
>>>Documentation: Manage Software Images
SWIM gives you full control over scheduling automatic updates to your devices. For more of what it can do, see the section in the documentation.
You might also take a look at Design -> Network Profiles and Design -> Authentication Template. The latter is where you set up the default port authentication type. This blog will skip past those as slightly more advanced features.
Conclusion
In this blog, you saw how to tell DNAC about some basic configuration settings, like credentials, AAA, NTP, etc. You also saw how the Network Hierarchy gets created and some of what it can do for you. And you visited the SWIM module for managing your collection of software images and automated deployment of them to device groups.
![]()