This is the sixth in a series of blogs, the DNAC Instant Demo tour.
Prior blogs in this series:
- DNAC Tour Part 1: Introduction to Cisco DNA Center
- DNAC Tour Part 2: DNAC Instant Demo: Beginning Your Tour
- DNAC Tour Part 3: General Navigation and Highlights: Dashboard, Drill Down, Assurance, and Troubleshooting
- DNAC Tour Part 4: Getting Started Tasks (Overview): Discovery, PnP, Templates, Provisioning
- DNAC Tour, Part 5: Using DNAC: Design, Inventory, SWIM
The next item on our DNAC Instant Demo tour is taking a look at the components used to deploy an SD-Access Fabric. I’ve split it into two parts, two blogs.
I’m going to try to keep this simple so that it makes sense even if you’re not knowledgeable about SD-Access. All you’ll need to know is that SDA provides macro- and micro-segmentation, and DNAC can automatically provision that, as well as provision sites as switch fabrics (think spine-leaf), and configure how they connect, including VXLAN tunneling if desired.
The key takeaway is how little CLI configuration the administrator does with DNAC. Instead, you use the GUI to do some organizational/design tasks like create IP Pools (already covered). Most of actually provisioning the fabric at a site is a few GUI clicks.
Link to Learn More About SD-Access
Reminder: I wrote a series of blogs about SD-Access functionality and design in 2020, most of which remain valid. The final blog in that series: https://netcraftsmen.com/sd-access-flows-sda-transit/ starts with a list of all the other blogs in the series. Recommended reading if you want an introduction to SD-Access!
Macro-segmentation and VNs (Policy)
Tour item: Explore configuring macro-segmentation settings (SD VNs, or Virtual Networks, which are VRFs).
“Configure” equates to “Provision” in the DNAC menus in most cases. Or vice versa, Provision is the automated version of configuring something.
>>>Documentation: Configure Policies
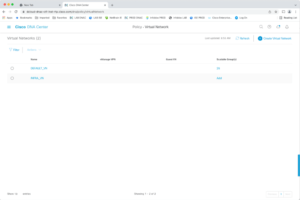
Segmentation is a policy item. So go to Policy -> Virtual Network.
(A virtual network or VN is essentially another name for a VRF, as far as I’m concerned.)
Click on the + sign to see how you’d add another VN. Note that SDA can integrate with SD-WAN by associating VNs/VRFs with SD-WAN VPNs. Check the box if the VN is for Guest use (wired and wireless). You would normally then click on Save.
Design point: I generally reserve VNs for segments that I want to be isolated (from each other) by a firewall. Employees, Guests, IOT, and Public Safety, might be some representative VNs. See my prior SDA blog series for a discussion of SDA design. Links to it were provided in an earlier blog.
Because connectivity to the firewall(s) and policy rules both need to some extent, to be manually configured for each VN, I tend to try to limit how many I create. There are generous limits in DNAC as well. But do not go crazy with large numbers of VNs.
The way this works is you create VNs here, and later you can choose which ones you want deployed at a given site fabric.
Micro-Segmentation and SGTs (Policy)
Tour item: Explore configuring micro-segmentation. Go to Policy -> Group-Based Access Control (GBACL).
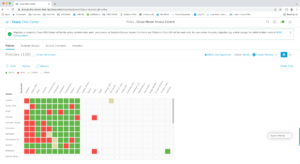
The names shown are security groups, which are associated with Security Group Tags (SGTs) carried in VXLAN headers.
You are looking at the policy MATRIX, which amounts to policy rules (access lists) on what traffic is allowed between the source and destination SGTs. These are also referred to as SGACLs, and Security Group ACLs.
Red means a deny policy is applied. Green is a permit policy. Gold is for a custom policy.
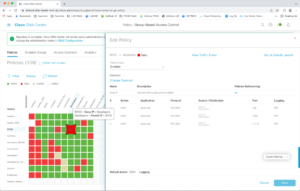
If you double-click a red square, you’ll see the Edit Policy dialog. Yes, that’s an access list. You can check out the green and tan boxes if you wish. Note the overall default up top is Permit.
If you dismiss the Edit Policy overlay, clicking on the lines icon in the upper-right changes to a table view. (Not visible in the above screen capture.)
Now dismiss the overlay dialog screen (click on the X, upper right corner) to get back to the main matrix screen.
Note the blue box at the top of the previous screen capture.
DNAC integrates with ISE, and you have to choose which tool controls certain shared functionality. Generally, you migrate and put DNAC in control so it can be used for all device configuration or fabric configuration tasks without having to switch over to the ISE GUI.
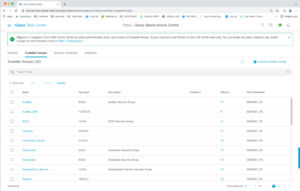
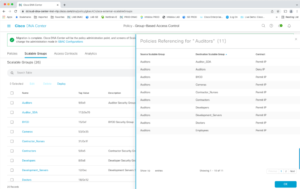
Now click on Scalable Groups.
This is where you create or edit the groups.
An SGT can be associated with one or more Virtual Networks. For example, if you have Office and Public Safety VNs for a government organization, then each might have a Staff group. That would show up in the right-most column above.
Click on the count under Policies to see a summary of the policies configured for each group.
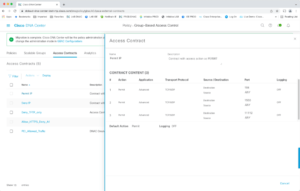
Click on Access Contracts. This is where you can create a set of rules for use in multiple ACLs.
Scalable Groups Analytics
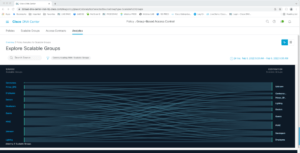
Click on the Analytics tab. This lets you view traffic information.
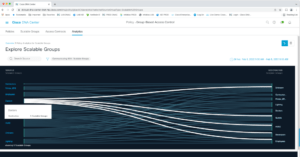
For instance, click on Scalable Groups. You’ll see the following Sankey diagram; showing flows between various Scalable Groups.
This becomes easier to read if you put the cursor over a source group.
Conclusion
At this point, we’ve looked at how you can create VNs and SGs (Security Groups) and configure policies on traffic between different SGs within a given VN. Such Security Group Policies are enforced by the switches. And summarized in the matrix.
We’ve also seen how VNs (or VRFs) are major segments in the network. Policy for inter-VN and VN to the outside world is typically enforced on an external firewall. (Or router if you wish.)
The next blog will cover how you tell DNAC what you want for a site fabric and deploy that. Configuration without CLI!

