
This is the seventh in a series of blogs, the DNAC Instant Demo tour.
Prior blogs in this series:
- DNAC Tour Part 1: Introduction to Cisco DNA Center
- DNAC Tour Part 2: DNAC Instant Demo: Beginning Your Tour
- DNAC Tour Part 3: General Navigation and Highlights: Dashboard, Drill Down, Assurance, and Troubleshooting
- DNAC Tour Part 4: Getting Started Tasks (Overview): Discovery, PnP, Templates, Provisioning
- DNAC Tour, Part 5: Using DNAC: Design, Inventory, SWIM
- DNAC Tour, Part 6: Exploring SDA Fabric Provisioning, Part 1: VRFs (VNs), GBACLs and SGTs
This blog continues the SDA Provisioning topic from the prior blog.
Provisioning a Fabric Network
Tour item: We will next look at the tools for provisioning an SDA switch fabric. The key thing to take away from what follows is how you can configure a set of switches for an entire site by clicking and a small amount of typing.
>>>Documentation: Provision Fabric Networks
Click on Provision -> Fabric.
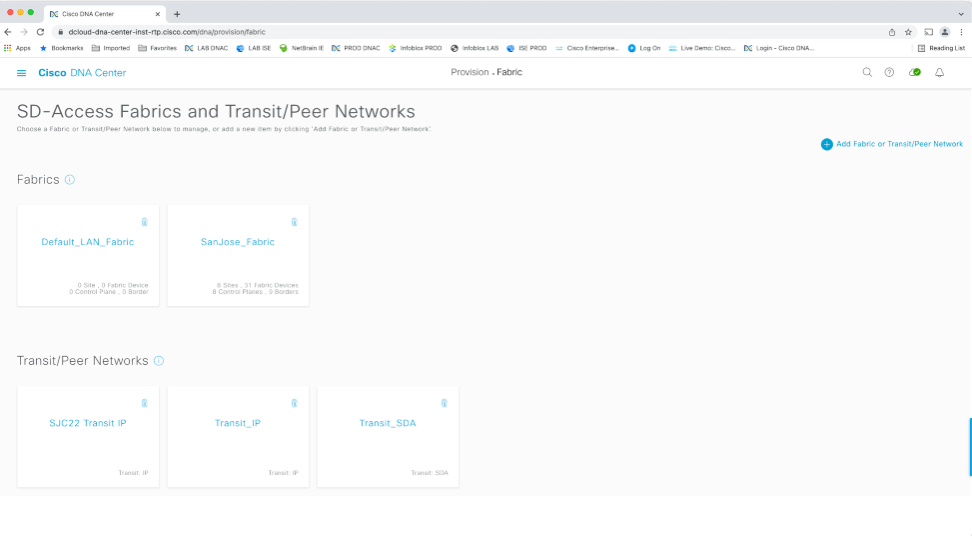
Transit/Peer Networks are connections between the Fabrics (sites or groups of sites in a single fabric).
A Transit_IP is a BGP-based IP connection between sites or fabrics via the “underlay” and ordinary routing. They just have a BGP ASN. Click on one to view its info. Then Cancel to dismiss the info screen.
Transit_SDA is an SD-Access VXLAN fabric interconnecting sites or fabric with inter-fabric VXLAN tunnels, in effect, a second tier of tunnels. Click to view what would be configured with such a Transit: endpoint fabrics or sites, etc.
Right now, it appears the CP Control Plane devices have not been configured for this Transit.
In an SDA fabric, the Control Plane node tracks which IP or MAC addresses are on which leaf switches so as to be able to VXLAN tunnel and route traffic between local devices (if the policy matrix permits that).
The Transit CP tracks which IPs are at which other site fabrics so that sites or fabrics can VXLAN tunnel to each other as needed to deliver traffic.
Click on Cancel to exit.
Click on San Jose_Fabric. You should see:
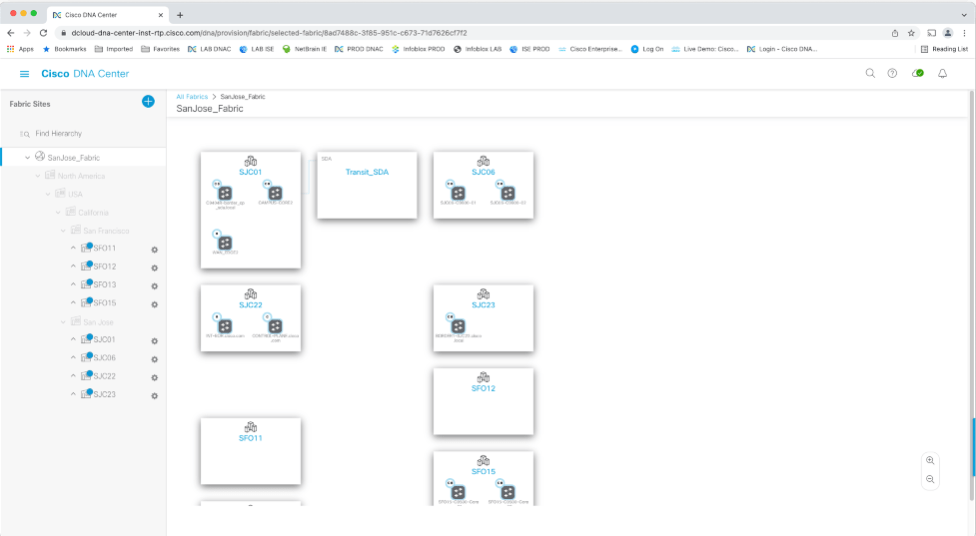
This shows a partially configured SDA Transit network. That is, sites or fabrics that will eventually be connected via VXLAN overlay tunnels.
Click on the blue title SJC01 to expand the box. You should see something like the following.
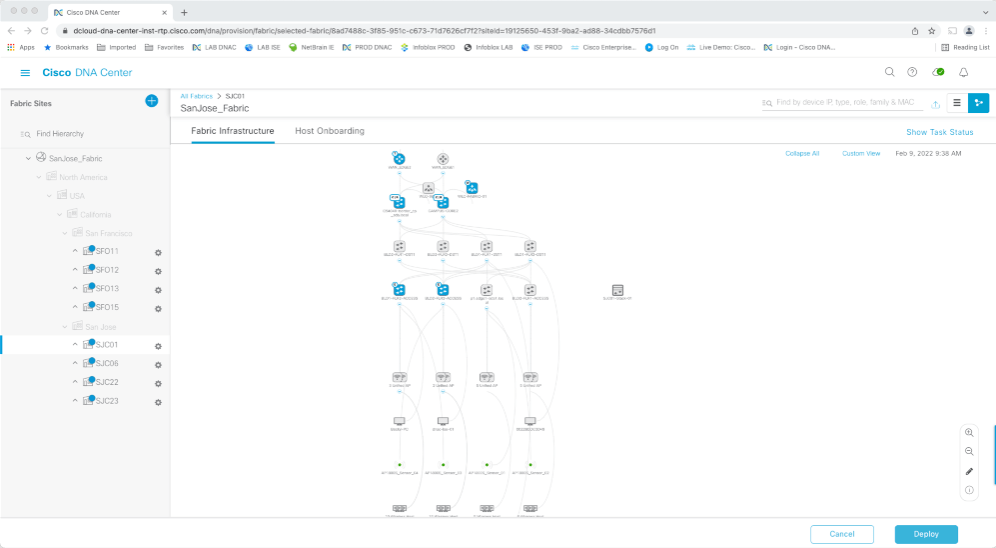
Note (upper right) that you can toggle between the diagram and a list view.
The blue icons indicate devices that have been provisioned (configured).
The little circled letters by each icon indicate which SDA role(s) it has been configured for.
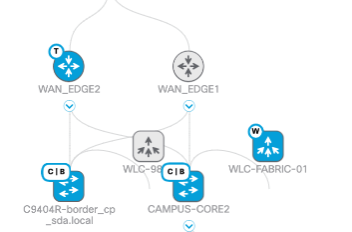
The letter C stands for Control Plane, the “know it all” device or pair for the site/fabric.
The letter B stands for Border, the device(s) that connect to the rest of the network.
W stands for Wireless, as in Wireless Controller, which might be a virtual WLC running on a switch or even on an AP.
E stands for fabric edge node, a leaf switch. There might be L2-only OT/IOT switches downstream of these.
You can see other switches in gray. They might not be provisioned, or they might not be playing an SDA role. That is, they might be an underlay supporting the fabric or non-SDA switches.
Looking lower in the diagram, you can also see attached APs, etc.
You can double-click the various icons.
Click on an E device.
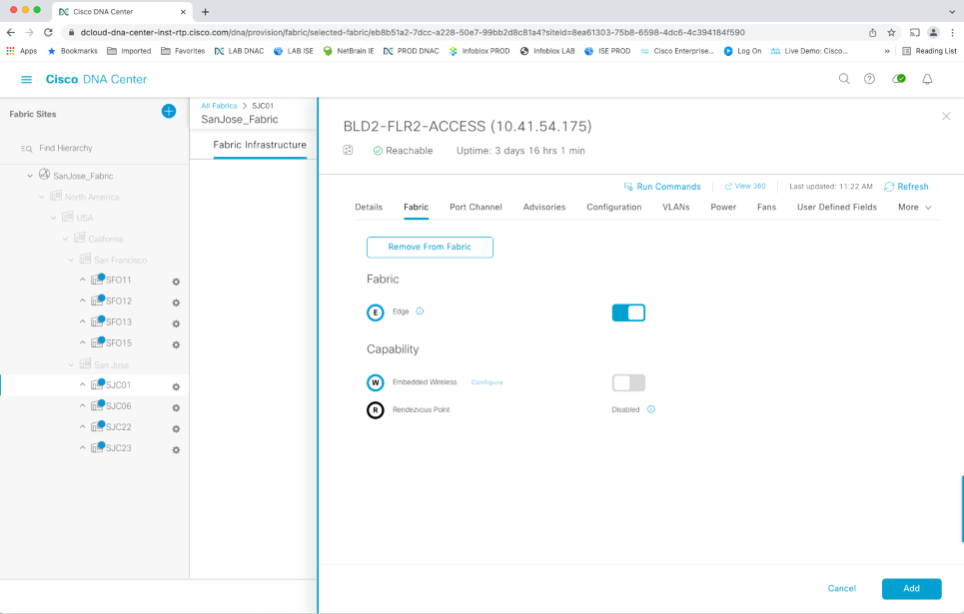
The slider was set to enable the edge role. It is not making embedded Wireless nor multicast Rendezvous Point. Those are the only things that would be needed to be chosen to indicate your intent. After doing so, the device could be provisioned with a couple of clicks.
Note the Tabs in the right side of the above screen capture. Click on Configuration to view the device configuration, for example.
You can click on the various tabs to get information about the device. Feel free to explore.
Click on one of the C|B Control Plane and Border devices.
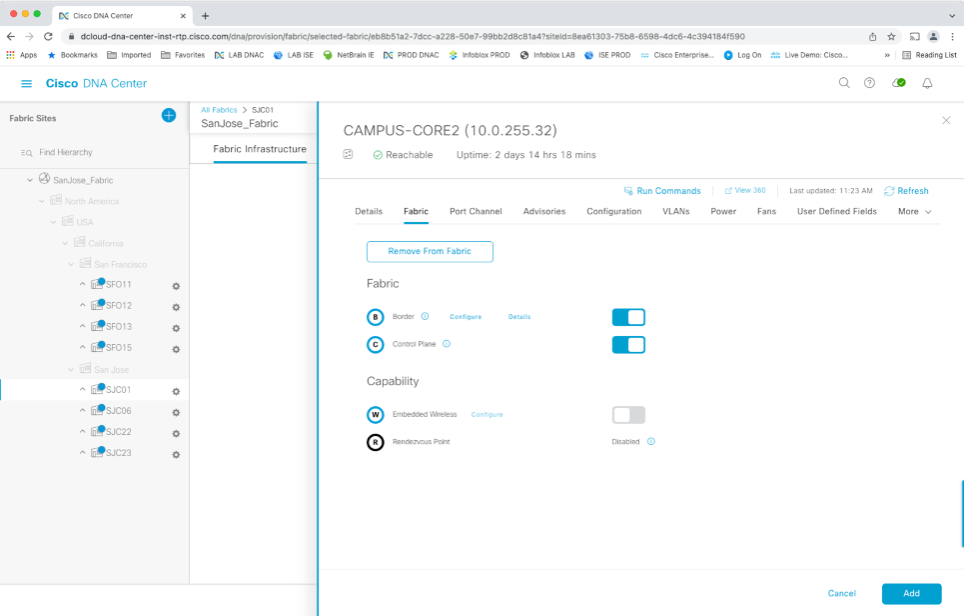
This device could support embedded Wireless (controller). If the slider were moved to the right to enable the functionality, you would click on Configure to configure it.
Control Plane was enabled, causing the relevant configuration to be pushed to the device when deployment steps were taken (a couple of clicks).
The Border role requires a bit more work. You can click on the blue word “Configure” to see what had to be provided.
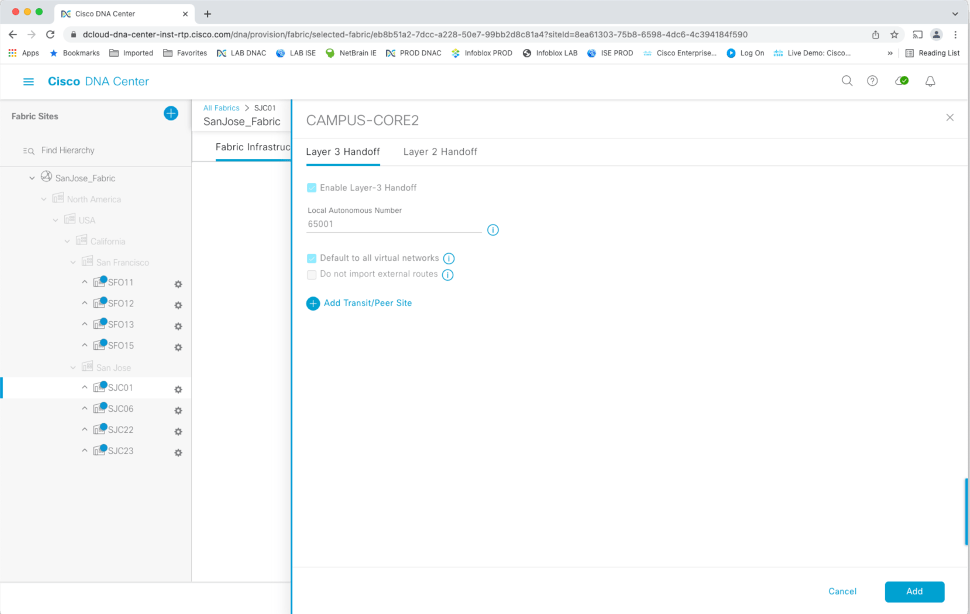
Note that apparently Transit/Peer site was not configured. That is where you’d choose from the Transits you had previously defined.
It is time for me to point out: notice that you have not seen CLI configuration anywhere in this!
To sum up, the Fabric Infrastructure tab is where you configure the site or fabric and fabric device roles.
Fabric Host Onboarding Tab
Tour item: Click on the Host Onboarding tab. This can be thought of as where you configure edge switch ports for user devices, APs, phones, etc.
(And by the way, a C | B switch can also have the E role. The way I think of this is that your core switches in a building might be doing C | B, but the closet they are in might also handle wiring for that floor or section of the building. This saves you from having to put dedicated E switches in that closet as well.)
Go ahead and explore the tabs.
Tour item: Authentication controls type of ISE authentication, by default on all switch ports.
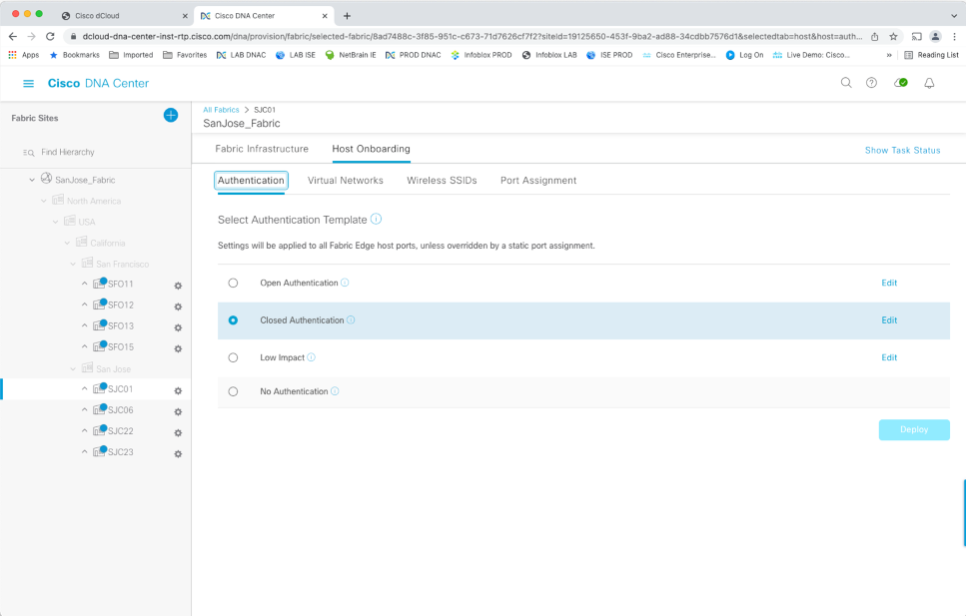
Hover over the circled letter ‘I’ for information.

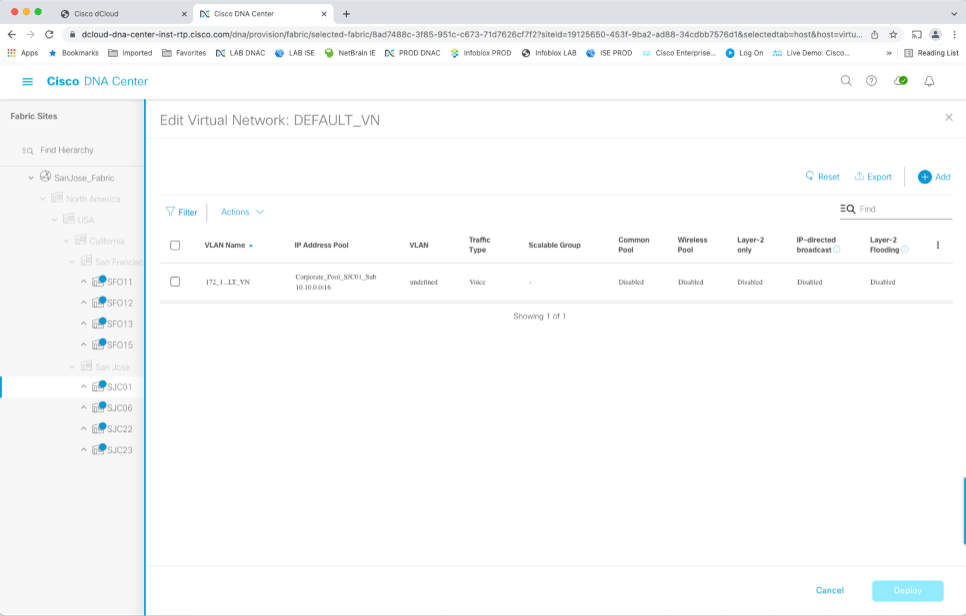
Tour item: The Virtual Networks tab controls which VNs are present in the fabric.
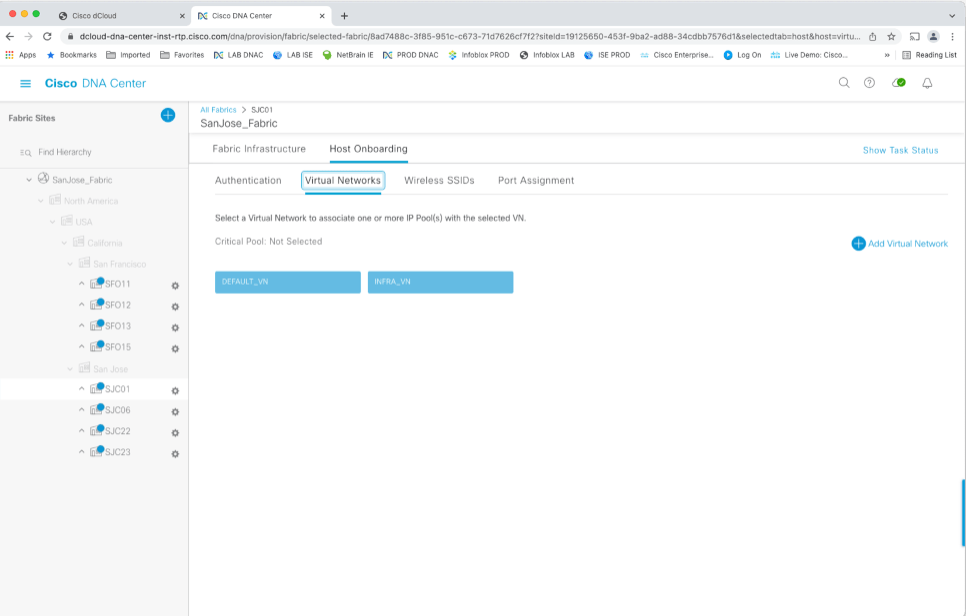
For each one, you must specify the IP pool.
The idea is that when a device connects, ISE determines which VN it should be in. DHCP then assigns an IP from the chosen IP pool. The various SGs available all share the same pool typically. SG enforcement is based on the SGTs associated with each attached device.
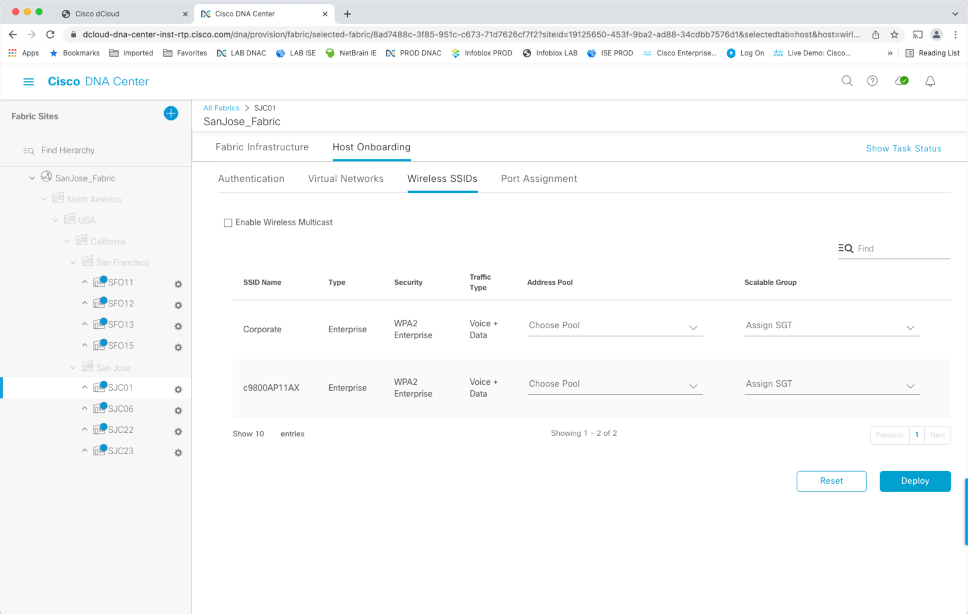
Tour item: Wireless SSIDs should be self-explanatory. This is where you define SSIDs and which IP pool and SGT are associated with the SSID. Etc.
Tour item: Port assignment is where you can control the port settings across all the edge switches, individually or in groups. I highlighted the word groups there because you probably do not want to click to individually configure every port in every switch stack in every closet at a site.
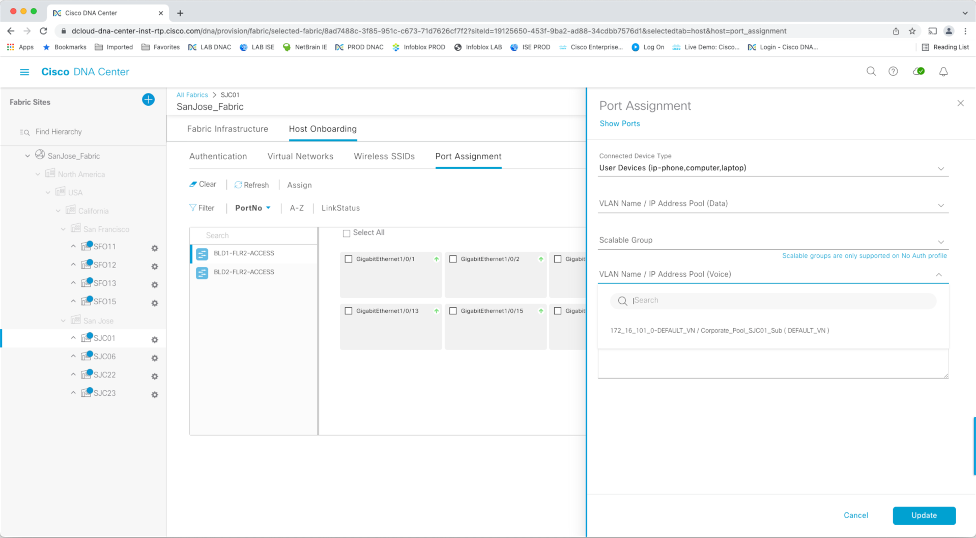
The color and small arrow in the upper right corner of each switch port rectangle indicate the port status (up/down).
Click in the upper right corner of a port box to assign it. I picked User Devices in the screen capture below. I then clicked on the VLAN Name field.
And that’s it for designing and deploying SD-Access!
The impression you should have at this point is that SDA fabrics can be configured with some prep and some GUI clicks and selections and occasional typing of the name of something. Everything else is automated!
Conclusion
In this and the prior blog, we saw how DNAC could be used to deploy (configure) a site fabric with relatively few clicks once various policies (configuration components) have been set up in DNAC.
That’s a great labor-saver if you’re doing SD-Access. It makes deployment faster and, importantly, CORRECT. No typos in taking a long configuration and editing it for each site or device!
As I’ve been emphasizing, you’ve also seen a lot of the rest of DNAC, which is useful even if you’re not doing SD-Access.